Skip to content
Facebook
Twitter
YouTube
Search
I JUST WANT 2 RIDE!!
Home
Motorcycle Bucket List
About this motorcycle blog
A Podcast for the 2 Wheel World
Awards (well kinda)
motorcycle helmet safety
June 19, 2026
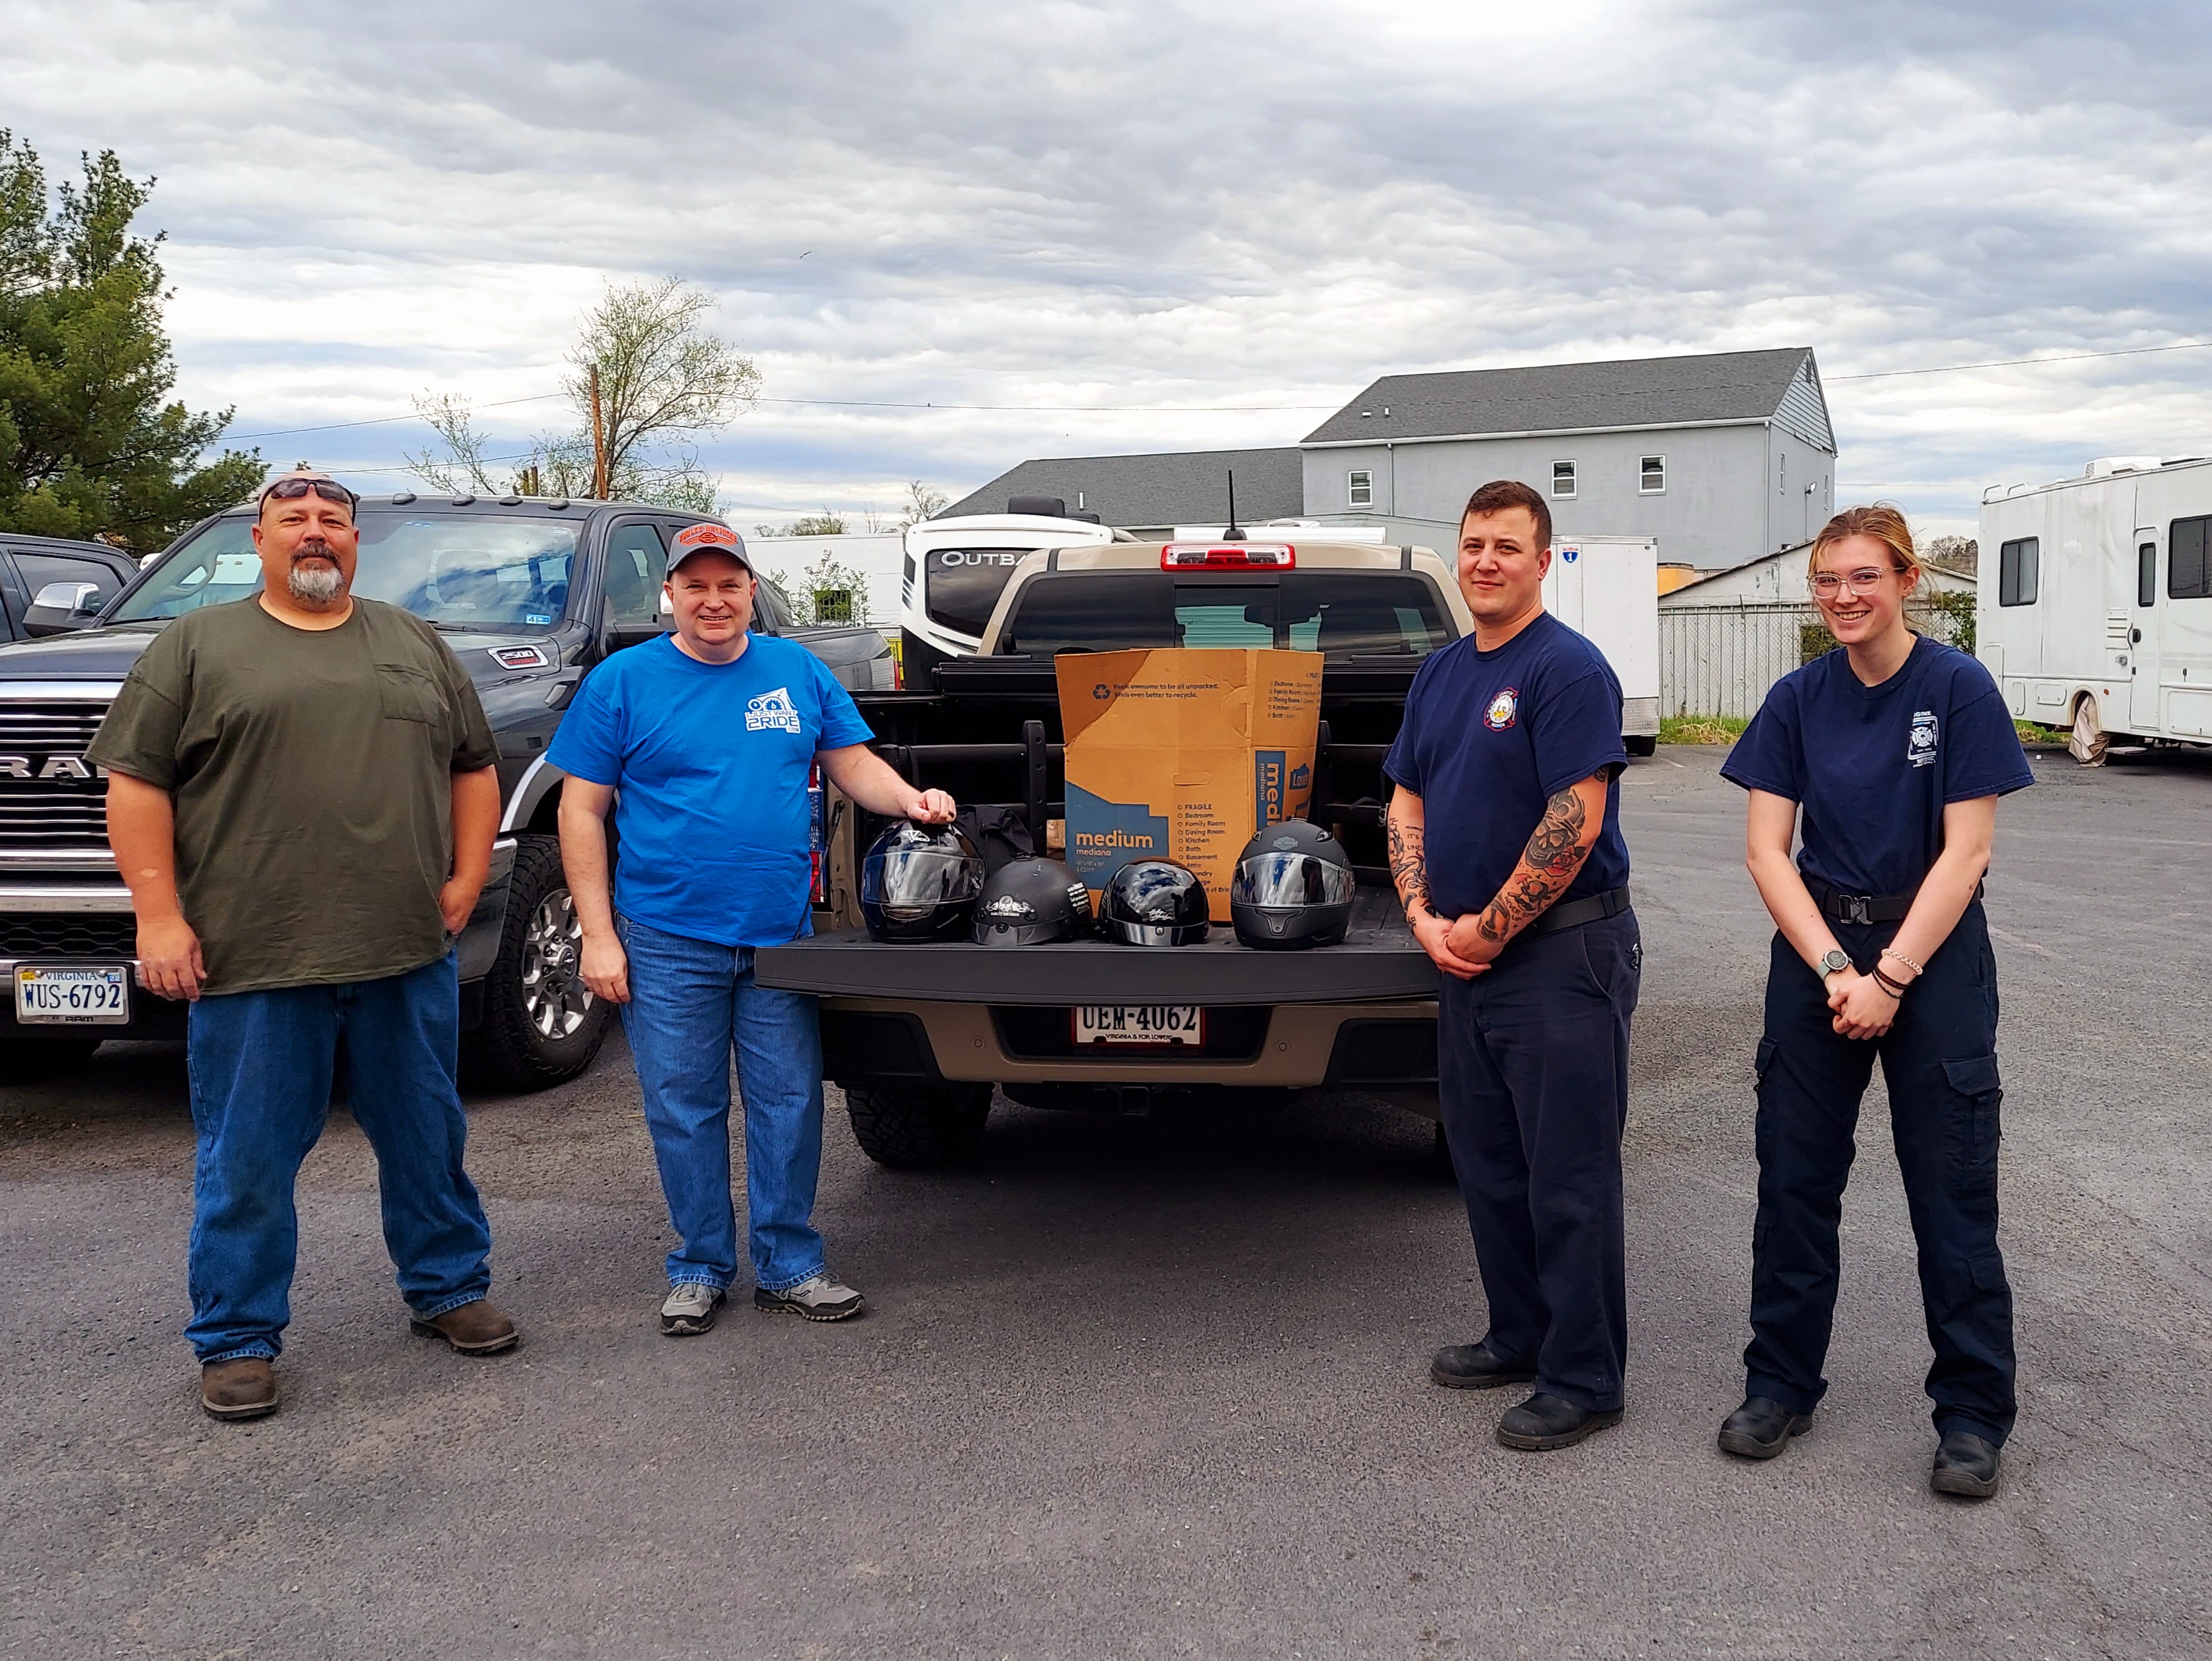
Donating Old Motorcycle Helmets to Firefighters and EMS for Training
warrenscottmassey
April 10, 2023
April is Motorcycle Helmet Safety Month
warrenscottmassey
April 18, 2022
Tips on cleaning a motorcycle helmet.
warrenscottmassey
April 16, 2022
What to do with old motorcycle helmets?
warrenscottmassey
April 13, 2020
9 Checks to make sure your motorcycle helmet is safe.
warrenscottmassey
April 8, 2019
9 Considerations to make your motorcycle helmet last
warrenscottmassey
April 5, 2019
9 Checks for you old motorcycle helmet
warrenscottmassey
June 23, 2018
How to Recycle or Dispose of Old Motorcycle Helmets? Guest Post by Sarah Kearns
warrenscottmassey
April 17, 2018
Motorcycle Helmet Safety Month: Fitment
warrenscottmassey
April 7, 2018
April is Motorcycle Helmet Safety Month – Part 2
warrenscottmassey
1
2
Next Page
Archives
News.
Recalls.
Touring
.
Ride to Eat
.
Vintage
.
Moto TV
.
Moto
Rides
.
C&O Canal
.
Loading Comments...
Write a Comment...
Email (Required)
Name (Required)
Website